Homeowners sometimes find that aging shingle roofs struggle to handle heavy rainfall. They dream of sleek flat roofs that create usable outdoor spaces above their homes. Everyone wants clear answers on how to transition from a shingle roof to a flat roof without confusion or costly mistakes.
You can start with a structural inspection, then completely remove the old shingles to prepare the deck. Install tapered insulation, then weld the appropriate membrane, and carefully apply metal edge finishes. These proven steps turn dreams into a leak-proof reality for any homeowner ready to upgrade confidently.
Key Considerations Before Transition
Flat roof installation requires smart planning before crews touch the ladder. Home structures face new weight loads unlike sloped shingle designs. Codes demand specific TPO membrane thicknesses plus edge metal detailing everywhere.
These critical factors guide successful projects smoothly from start to finish.
- Structural engineering review confirms that existing joists can support flat-roof loads, not the pitched roofs currently in place. Engineers quickly provide stamped drawings required for permit approval at the city offices.
- Drainage slope planning ensures a minimum of 1/4 inch per foot, preventing water ponding during storms. Tapered insulation effectively creates a positive flow toward scuppers or drains.
- Budget allocation covers shingle demo and materials, with costs averaging $10- $20 per square foot when installed professionally. Labor comprises 60% of total costs for low-slope expertise.
- Climate-appropriate materials select TPO for hot regions versus EPDM rubber for freeze-thaw cycles annually. Proper material selection can significantly extend membrane warranties. Sometimes it reaches up to 20–30 years… depending on the product and conditions.
- Permitting documentation includes detailed plans that precisely show parapet heights and gravel stop locations. Missing engineer seals delay projects two to four weeks unnecessarily.
Step-by-Step Process to Transition From Shingle to Flat Roof
Shingle-to-flat roof projects follow a proven sequence that ensures waterproof results every time. Each step builds on previous work carefully. So the transformation completes smoothly without surprises later. Contractors transform sloped roofs through methodical phases below:
Roof Inspection and Assessment
Engineers first examine joist spacing to confirm structural strength under low-slope loads. Moisture scans reveal hidden leaks under shingles before demo work begins onsite. Damaged decking gets flagged for replacement during initial walkthroughs. This phase prevents costly surprises that derail budgets midway through projects. Once the roof assessment confirms stability, crews prepare for shingle removal with confidence.
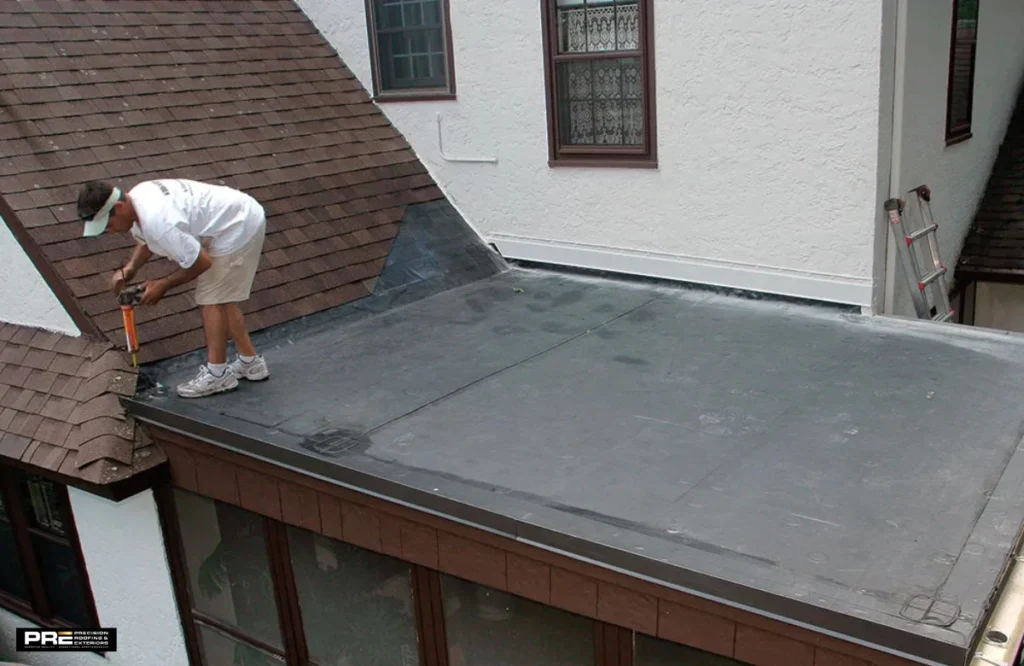
Removing the Shingles
Pneumatic tear-off machines typically strip shingles down to bare decking within one day. The underlayment peels away, leaving the plywood surface clean for the next inspection. Crews haul debris immediately… so the preparation phase starts without delays piling up. Sharp nails get cleared to protect new membrane layers underneath. With the deck clearly exposed, workers focus on surface preparation that sets the foundation’s strength.
Preparing the Roof Deck
Damaged plywood sections are replaced with tongue-and-groove boards to create a solid base. Tapered insulation layers are installed to create drainage slopes without visible bulk. Perimeter blocking nails in place for secure flashing attachments later on. Deck priming seals wood grain so the membrane bonds tightly without air pockets. Now the foundation supports a waterproof layer that protects buildings for decades ahead.
Installing the Flat Roof Membrane
TPO sheets unroll perpendicular to the slope for the strongest possible seam overlap. Heat welders fuse edges at 400-600°F to achieve monolithic waterproofing. Mechanical plates secure field areas to the decking and joists below. Scuppers integrate with drains for overflow protection during heavy storms. Final detailing completes the transformation with a professional appearance and built-in weather protection.
Finishing Touches
Metal coping caps parapets for wind resistance and a clean aesthetic appeal too. Walk pads protect high-traffic zones near HVAC equipment from foot damage. Edge metal flashings seal penetrations around vents and chimneys meticulously. Slope tests verify drainage before the cleanup finishes, ensuring the job site is perfectly prepared.
Conclusion
People wonder how to transition from a shingle roof to a flat roof when dreaming of rooftop decks above. Start with a structural inspection, then strip the shingles to expose the smooth plywood deck underneath. Layer tapered insulation before the TPO membrane to create a completely seamless waterproof barrier.
Add edge metal plus walk pads so the system performs for a minimum of 30 years easily. A methodical process eliminates guesswork for stunning results, guaranteed every time. TPO membrane systems perfectly outperform shingles for contemporary home designs.
Need expert shingle-to-flat roof services without headaches? Contact expert roofing contractorlike Precision Roofing now. Our licensed crews handle codes, TPO welding at 400-600°F, and tapered insulation installation flawlessly.
FAQs
Can you put shingles on a flat roof?
No shingles lift off flat roofs in wind because they need a minimum 3-in-12 pitch for water shedding. Flat roofs require membrane systems that seal completely without slope support.
What are the alternatives to replacing roof shingles?
TPO membranes, EPDM rubber, PVC roofing, modified bitumen, and metal standing-seam roofing completely replace shingles. Each offers better waterproofing and durability for the various available roof types.
How to transition from a sloped roof to a flat roof?
Start by inspecting the deck, then tear off the shingles to expose a clean plywood surface. Install tapered insulation and weld TPO membrane seams tightly so the waterproofing works properly.