
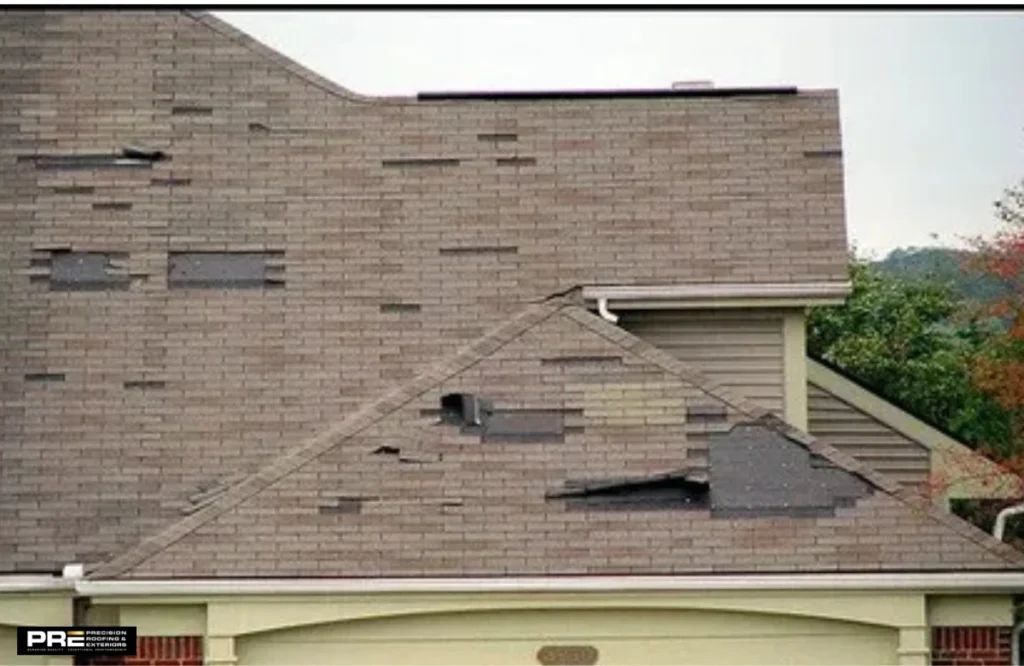
To tarp a roof after storm damage, first inspect the damage from the ground, gather your supplies, and take safety precautions before climbing. Make sure to clear debris from the damaged area and secure the tarp with enough overlap to extend beyond the damaged section on all sides. A properly installed tarp stops water from causing further damage inside the home.
Core Takeaways
- Roof tarping after storm damage is a temporary protective measure, not a permanent fix. The goal is to prevent water from entering until a proper repair is done.
- The tarp needs to be large enough to extend at least 4 feet beyond the damaged area on all sides and, if possible, reach over the roof ridge.
- Heavy-duty polyethylene tarps rated at least six mil thick hold up better than lightweight options in wind and rain.
- Never get on a wet roof. Never work alone. If the roof slope is steep or the structural damage is significant, call a professional.
- Most homeowners’ insurance policies cover emergency tarping costs as part of the claim. Document everything before you start.
Why Tarping a Roof After Storm Damage Matters
Water gets in fast after storm damage and the longer the roof stays open, the further the damage spreads. Decking, insulation, ceilings and anything in the attic all take on water damage quickly. A tarp installed promptly contains the damage that the storm actually caused. Insurance adjusters also look more favorably on claims where the homeowner took reasonable steps to prevent further water damage after the initial event.
What You Need Before You Start
Getting the materials together before going up saves time and reduces the number of trips up and down the ladder.
Tarp Size and Material
The tarp needs to be bigger than most people expect. It should extend at least 4 feet beyond the damaged area in every direction and, ideally, run over the roof ridge so it can be anchored on both sides. Heavy-duty polyethylene tarps at 6-mil thickness or thicker hold up in wind far better than the thin blue tarps from a hardware store. Silver or brown tarps tend to be heavier-duty than the standard blue ones. Buy bigger than you think you need. Overlapping too much is never a problem. Too small is.
Tools and Supplies Needed
- Heavy-duty polyethylene tarp
- Two-by-four lumber boards to anchor the tarp edges
- Roofing nails or screws
- Rope or bungee cords as backup securing
- Hammer or drill
- Utility knife
- Ladder tall enough to safely reach the roof
Safety Equipment
Non-slip footwear, work gloves and a safety harness if you have one. Never go up alone. Someone needs to be on the ground at any time someone is on the roof. If the pitch is steep or the surface feels unstable don’t attempt it yourself. Call a professional.
How to Tarp a Roof Step by Step
The order matters here. Rushing any of these steps is where most DIY tarp jobs go wrong.
Assess the Damage From the Ground First
Before getting on the roof look at the damage from the ground. Use binoculars if you need a closer look. Figure out where the damage is, how large the affected area is and whether anything looks structurally wrong like sagging sections or large debris still sitting on the roof. If the structure looks compromised stay off it.
Set Up Safely Before Climbing
Place the ladder on a level surface far from any damaged fascia or gutters. Have the base held by someone. Instead of making several hikes, try to bring everything you need up in one trip. Before placing your entire weight on the roof, inspect its surface.
Clear Debris From the Damaged Area
Before putting the tarp down clear away any branches, broken shingles or other debris from the damaged area. Debris under the tarp creates gaps that let water in and wear through the tarp material over time. Be careful not to push anything into open holes or damaged sections while clearing.
Position and Secure the Tarp
Lay the tarp so it covers the damaged area with at least four feet of overlap on all sides. If the damage is near the ridge run the tarp over the top and down the other side. Place a two-by-four along the top edge of the tarp and fold the tarp over it, then nail or screw through the board and tarp into the roof decking. The board distributes the load and stops the nails from pulling through the tarp in the wind.
Anchor the Tarp Properly
Secure the remaining edges using the same two-by-four method. Run boards along each side and nail them down through the tarp into the decking. The tarp should be pulled tight with no loose sections that can catch wind and lift. Check all corners are secure and that the tarp has no gaps along the edges. A loose tarp in a wind event becomes a sail and can cause additional damage.
Common Mistakes to Avoid When Tarping a Roof
- Using a tarp that is too small is the most common mistake. A tarp that doesn’t extend far enough past the damaged area lets water run under the edges. Always go bigger.
- Draping a tarp over the roof and weighing it down with a few bricks is not secure. It needs to be nailed down properly with boards distributing the load along each edge.
- Wet shingles are slippery. Structurally damaged sections can give way under weight. If conditions aren’t safe don’t go up.
- A tarp that blocks roof vents or drainage paths creates moisture buildup and additional problems. Position the tarp carefully to avoid covering functional roof components.
How Long Can a Roof Tarp Last
A properly installed heavy-duty tarp can last anywhere from a few weeks to several months, depending on weather conditions and the quality of the tarp. UV exposure degrades polyethylene over time and strong wind events put stress on the anchor points. Most tarps installed after storm damage are meant to last long enough for the insurance claim to be processed and a contractor to schedule the repair. Check the tarp after any significant weather event and resecure any sections that have lifted or shifted.
When to Call a Professional Instead
If the roof is steep, the structural damage is significant or the affected area is large enough that safe installation isn’t possible without proper equipment call a professional. Emergency tarping services are available in most areas after major storm events and the cost is usually covered under the emergency mitigation portion of a homeowner’s insurance claim. Getting a professional tarp installed properly is far less expensive than the water damage that follows a poorly installed DIY attempt.
Conclusion
Roof tarping after storm damage comes down to doing it right rather than doing it fast. A properly secured tarp with solid anchor points holds through further weather. A rushed job with an undersized tarp fails in the next wind event and makes everything worse. If the roof is safe to access, follow the steps in this guide. If there’s any doubt about safety call a professional. Reach out to experienced roofing contractor like Precision Roofing and Exteriors for emergency tarping and storm damage assessment.
FAQs
How big should a roof tarp be?
At least four feet larger than the damaged area on every side. If the damage is near the ridge, the tarp should run over the top and down the other side so it can be anchored properly. When in doubt go bigger.
Will insurance cover the cost of tarping a roof?
Emergency tarping is typically covered by homeowner’s insurance plans under the mitigation of further damage clause in storm damage claims. Before tarping, take pictures of the damage and preserve all receipts for supplies or expert services.
Can I tarp a roof myself or do I need a professional?
If it’s safe to reach the roof, the slope isn’t too steep, and the surface hasn’t been weakened by structural problems, you can do it yourself. If any of those conditions aren’t met, call a professional. The risk of injury on an unstable or slippery roof outweighs the cost of hiring someone who does this regularly.