
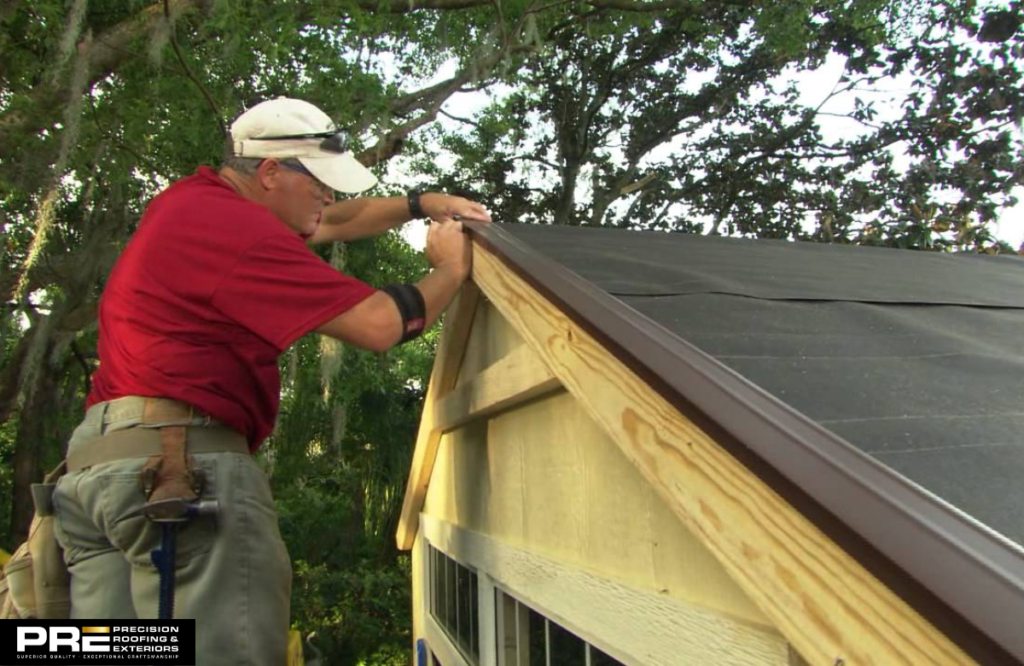
Shingling a shed roof starts with a sound deck, proper underlayment, and careful shingle placement. Asphalt shingles offer affordable protection for many sloped sheds. However, small roofs still need accurate measurements and safe installation. You’ll need to prepare the surface, install drip edge, mark straight courses, and secure every shingle correctly. A rushed job can lead to leaks, wind damage, and costly wood repairs. That’s why knowing how to shingle a shed roof properly can help you avoid common installation mistakes and protect your shed for years.
Key Takeaways
|
Can You Put Asphalt Shingles on Your Shed Roof?
Yes, you can put asphalt shingles on many shed roofs. They work best when the roof has enough slope to drain rainwater quickly. The roof deck must also remain flat, solid, dry, and free from rot. Asphalt shingles suit conventional sloped sheds especially well. However, very low-slope roofs may require another system or added waterproofing. Always check local codes and product instructions before starting. Proper underlayment, drip edge, and flashing also help protect the shed from moisture.
What Tools and Materials Do You Need to Shingle a Shed Roof?
A well-prepared workspace keeps the installation moving smoothly. Your exact quantities will depend on the roof size, pitch, shingle type, and manufacturer requirements.
Tools
- Tape measure for calculating roof dimensions and overhangs.
- Chalk line for marking straight horizontal shingle courses.
- Utility knife with hook blades for cutting shingles.
- Roofing hammer or pneumatic roofing nailer.
- Pry bar for removing old shingles and nails.
- Roofing shovel or shingle removal tool.
- Tin snips for cutting metal drip edge.
- Sturdy ladder suited to the shed’s height.
- Broom or brush for clearing loose debris.
- Safety glasses, gloves, and slip-resistant work boots.
- Fall-protection equipment for higher or steeper roofs.
Materials
- Fiberglass asphalt shingles designed for the roof’s slope.
- Starter strip shingles or properly prepared starter pieces.
- Compatible roofing nails in the recommended length.
- Synthetic underlayment or asphalt-saturated roofing felt.
- Metal drip edge for eaves and rake edges.
- Roofing cement or compatible sealant where required.
- Replacement plywood or decking boards if damage appears.
- Ice and water protector where local conditions require it.
- Ridge cap shingles for a gable-style shed roof.
- Flashing for vents, walls, and other roof penetrations.
- Extra shingles for cutting, waste, and future repairs.
How Many Shingles Do You Need for a Shed Roof?
Calculate the total roof surface instead of using the shed’s floor size. Measure each roof plane’s length and slope length, then multiply them together. Add the areas for all roof planes. One roofing square covers 100 square feet. Buy around 10% extra for cuts, waste, and future repairs.
Step-by-Step Guide to Shingling a Shed Roof
A reliable installation follows a specific order from deck preparation through edge finishing. Each layer supports the next. Work upward because shingles and underlayment must shed water downhill. Product instructions may change nail counts, overlaps, and exposure measurements. Wear suitable safety equipment before climbing onto the roof.
Step 1: Remove Old Roofing and Inspect the Roof Deck
Begin by removing the old shingles, nails, felt, and loose debris. Use a pry bar or roofing shovel carefully. Avoid damaging sound decking during removal. Once exposed, inspect the surface closely for problems.
Look for:
- Soft or spongy areas.
- Dark water stains.
- Rot or mold.
- Sagging sections.
- Loose boards.
- Missing or raised fasteners.
Replace damaged decking before adding new roofing layers. The surface should feel solid and remain clean and dry. Shingles cannot correct a weak roof deck. Covering damage only hides the problem until leaks return.
Step 2: Install the Drip Edge Along the Eaves
The eave forms the lower roof edge where rainwater leaves the shed. Install metal drip edge directly along this edge. Keep its horizontal flange flat against the roof deck. Let the lower metal lip extend beyond the decking.
Fasten the drip edge with compatible roofing nails. Keep adjoining pieces properly overlapped. Don’t nail through the vertical face of the metal. The eave drip edge generally sits beneath the underlayment. This arrangement helps direct water away from the fascia and exposed deck edges. Follow the specific spacing listed by your product instructions.
Step 3: Install the Underlayment From the Bottom Up
Start the first underlayment row along the eave. Keep its lower edge straight and properly aligned. Extend it over the eave drip edge according to the product instructions. Secure the material with suitable roofing nails or cap fasteners.
Add each higher row while overlapping the row below. Maintain the required side and end laps. Smooth out wrinkles before fastening the material. Large gaps can create paths for water. This secondary barrier protects the decking beneath the shingles. Check local requirements for ice and water protection near vulnerable eaves.
Step 4: Install the Drip Edge Along the Rake Edges
Rake edges run along the sloping sides of a gable-style shed roof. Install rake drip edge after completing the underlayment. Begin near the lower eave and work toward the upper roof edge.
Overlap adjoining sections in the direction that limits water entry. Fasten through the upper flange into the roof deck. Avoid bending or crushing the metal while driving nails. Keep the drip edge straight for cleaner shingle cuts. Rake flashing helps protect the decking from runoff and wind-driven rain. Shingles should extend slightly beyond the drip edge when the manufacturer allows it.
Step 5: Snap Chalk Lines to Keep the Shingles Straight
Chalk lines prevent shingle courses from drifting across the roof. Begin by marking the starting position near the eave. Base the mark on the required shingle overhang. Then snap a horizontal line across the roof’s full width.
Mark additional lines using the shingle’s exposure measurement. Don’t estimate this spacing by eye. Use the actual product dimensions instead. You can also mark vertical reference points near the rake edges. Check the first line carefully before continuing. A small mistake at the eave becomes much more visible near the roof peak. Straight lines create a cleaner finish and better shingle alignment.
Step 6: Install the Starter Strip Along the Eave
The starter strip creates a sealed base beneath the first full shingle course. Use purpose-made starter shingles whenever possible. You can prepare compatible three-tab shingles if the manufacturer permits it.
Position the starter strip with the required overhang beyond the drip edge. Keep its adhesive strip correctly oriented. Nail each piece in the approved fastening area. Don’t place nails where later shingle tabs cannot cover them. Starter strips help protect the eave from wind-driven rain. They also improve the first row’s appearance and wind resistance. Always follow the selected product’s layout and fastening instructions.
Step 7: Install the First Full Course of Shingles
Begin at the lower corner of the roof. Align the first full shingle with the starter strip and rake edge. Follow the manufacturer’s exposure and overhang requirements. Continue across the eave while checking each shingle’s position.
Keep adjoining pieces properly aligned. Look across the row before completing the fastening. This pause can reveal a crooked beginning. The first full course controls every row above it. Therefore, accuracy matters more than speed here. The shingle bottoms should sit evenly over the starter strip. Maintain the recommended projection beyond the drip edge at the eave and rake.
Step 8: Nail the Shingles Correctly
Incorrect nail placement can cause leaks, blow-offs, and warranty problems. Use the nail type, number, and location listed by the shingle manufacturer. Drive every nail straight and flush with the shingle surface.
Never drive a nail so deeply that it cuts through the shingle. Keep fasteners inside the approved nailing zone. Avoid placing them below the seal strip unless instructions specifically allow it. Wind-prone locations may require additional fasteners. Generic nail patterns don’t always suit every product or climate. Follow local requirements and manufacturer directions for the safest result.
Step 9: Stagger the Shingle Courses as You Work Up the Roof
Move upward one course at a time after finishing the first row. Offset the joints between adjoining courses. Never let vertical gaps line up from row to row. Use the offset recommended for your specific shingle design.
Snap fresh chalk lines to maintain consistent exposure. Inspect each course before installing the next one. Keep the overall pattern balanced across the roof. Staggered joints create a stronger water-shedding surface. They also reduce direct paths for moisture beneath the shingles. Stop work immediately if rain, strong wind, or slippery conditions make the roof unsafe.
Step 10: Trim the Shingles Along the Rake Edges
Measure the rake edges from the finished roof surface. Mark each cut carefully before using your utility knife. A sharp hook blade usually creates a cleaner shingle cut. Score from the back when the product allows that method.
Avoid damaging the underlayment or metal flashing beneath the shingles. Fasten trimmed pieces using the approved pattern. Apply roofing cement only where the product instructions recommend it. Excess sealant can create messy edges and trap debris. If your shed has a ridge, install the final ridge cap shingles separately. Keep the finished edge straight, even, and securely sealed.
Do You Need Underlayment Under Shingles on a Shed?
Yes, asphalt shingles should normally have underlayment beneath them on a shed roof. Underlayment provides secondary water protection beneath the primary shingle surface. Always follow local codes and the manufacturer’s installation instructions.
Why Underlayment Matters
- Adds another moisture barrier beneath asphalt shingles.
- Protects the roof deck from wind-driven rain.
- Reduces water reaching the shed interior.
- Guides moisture beneath overlapping shingle courses.
- Protects decking while installation remains unfinished.
- Separates shingles from rough wood surfaces.
- Adds protection around eaves and vulnerable edges.
- Supports better performance during severe weather.
- May help satisfy local building requirements.
- Allows ice and water protector near vulnerable eaves.
- Synthetic underlayment often resists tearing during installation.
- Proper overlap prevents gaps between protective layers.
Underlayment cannot replace sound shingles or proper flashing. It works as part of a complete roofing system. Poor overlaps can still allow water to reach the decking.
Conclusion
Shingling a shed roof becomes manageable when you follow the correct order. Start with a strong, dry roof deck. Then install the eave drip edge, underlayment, and rake drip edge. Chalk lines will keep each course straight. Starter strips create a sealed beginning. Afterward, secure the full shingles with the correct nails and stagger their joints. Finally, trim the rake edges carefully and finish any ridge details.
Don’t ignore safety concerns, rotten decking, poor roof slope, or difficult access. If your shed roof needs reliable repair, replacement, or installation help, contact Precision Roofing for a professional inspection and free estimate.