
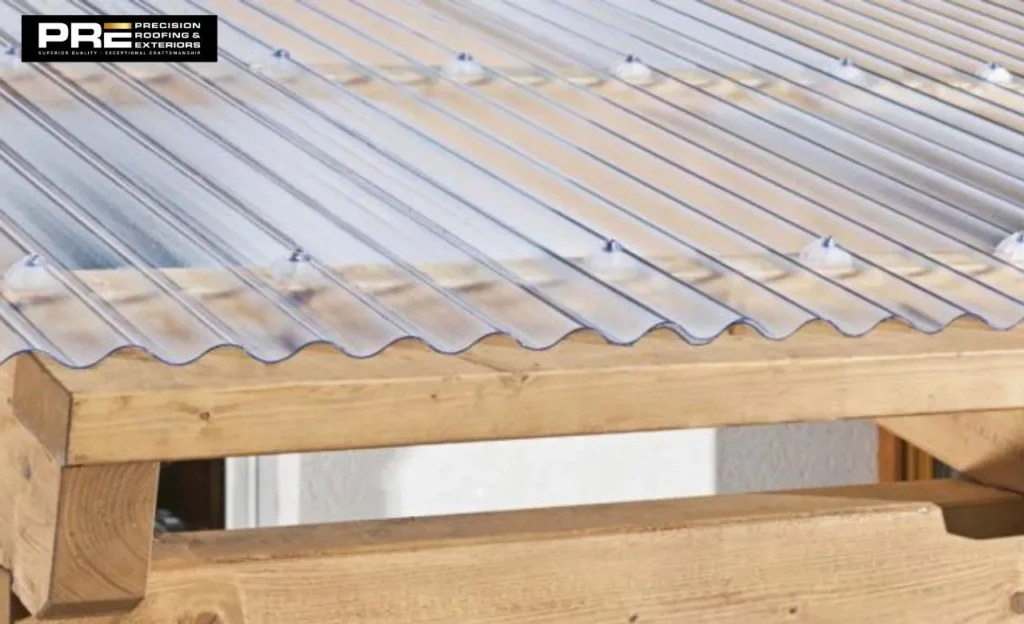
SunTuf roof panels are durable and lightweight, perfect for patios, carports and covered walkways. They are polycarbonate sheets that let light pass and protect from harmful UV rays. Proper installation can help provide a long service life and reduce the risk of leaks. This guide explains the panel features, planning steps, tools and precise methods.
Careful attention to pitch spacing and fastening prevents common problems. Homeowners achieve professional results by following each stage. Quality installation provides long-lasting weather protection for years.
Key Takeaways
- SunTuf roof panels are polycarbonate UV-protected sheets for use in outdoor covers.
- Proper water runoff is maintained with a minimum roof pitch of 1.5″ for every 12″ of run.
- Purlins should not be more than 36 inches apart for solid support.
- Always use oversized holes and EPDM washered fasteners.
- Proper side and end overlaps, plus closure strips, stop leaks effectively.
What Are SunTuf Roof Panels?
SunTuf roof panels are corrugated polycarbonate panels for outdoor use. They have high impact resistance and are easy to handle. One side is treated with a special UV-protective layer to prevent sun damage and yellowing. These panels will allow natural light to pass through and help to reduce the heat buildup in covered areas.
They can be used in a variety of applications for home and light commercial use where weather protection is desired but excessive weight is not required. If they are installed correctly, they can perform at their best and last the longest.
What Are SunTuf Polycarbonate Panels Made Of?
High-quality polycarbonate resin is made into a corrugated panel. The outer surface has a co-extruded UV layer that provides a long-lasting shield. This construction gives high impact strength far above glass or acrylic. The sheets resist cracking under hail or falling branches in normal conditions.
Where Are SunTuf Roof Panels Commonly Used?
Owners use them in their patio covers, carports, greenhouses and outdoor walkways. They can be used for lighting in garden structures and pool enclosures. They are convenient to use and many homeowners prefer them for do-it-yourself projects. The panels are also used on commercial sites for light-duty canopy roofs.
Benefits of Using SunTuf Roof Panels
The panels deliver high light transmission with strong UV blocking. Lightweight design reduces structural load on the supporting frame. Impact resistance protects against weather damage better than many plastics. Easy cutting and fastening speed up installation for most users.
What Should You Know Before Installing SunTuf Roof Panels?
Planning ahead prevents problems during and after installation. Roof structure details and local weather loads guide every decision. Correct pitch, support spacing and expansion room help keep the panels stable. Checking these points first leads to a watertight and durable finished roof.
- Check the Recommended Roof Pitch: The minimum recommended slope is 1.5 inches of rise in every 12 inches of run. Lower pitches require additional sealing to prevent water entry. Steeper slopes improve drainage and reduce debris buildup on the surface.
- Plan the Rafter and Purlin Spacing: Purlins must sit no more than 36 inches apart for proper support. Most projects use 24-inch spacing for better strength and economy. Rafters follow local code, often at 16 to 24 inches on center.
- Determine the Correct Panel Direction: Install panels with the UV-protected side facing upward toward the sun. The protective film usually marks the correct outer face. Wrong orientation voids the warranty and shortens panel life.
- Consider Wind, Snow and Rain Loads: Local wind and snow loads affect support spacing and fastener density. High-load areas need closer purlins and more fasteners. Always check building codes before final frame design.
- Allow For Expansion and Contraction: Polycarbonate expands and contracts with temperature changes. Oversized predrilled holes and proper fastener placement allow free movement. Failure to allow expansion causes buckling or stress cracks later.
What Tools and Materials Do You Need to Install Suntuf Roof Panels?
Gather all tools and materials before starting work on the roof. Ready supplies keep the job moving smoothly and safely. Correct accessories protect the panels and create tight weather seals.
- Required Tools: A measuring tape, chalk line, circular saw with a fine blade and drill form the core set. Tin snips, a utility knife and a ladder complete the basic tools. Safety gear, including gloves and eye protection, remains essential.
- Required Materials and Accessories: SunTuf roof panels of the proper length, plus matching closure strips, are required. EPDM washered fasteners or wall flashings and compatible sealant finish the list. Horizontal and vertical closure strips seal the edges effectively.
Easy Steps to Install Suntuf Roof Panels
Follow each step in order for a secure, watertight installation. Accurate measuring, cutting and fastening produce professional results. Attention to overlaps, expansion gaps and edge details prevents future leaks on the finished roof.
1: Measure the Roof Area and Plan the Panel Layout
Measure the full length and width of the roof area carefully. Calculate the number of panels needed, including side and end overlaps. Plan overhangs of one to three inches at the eaves. Layout ensures efficient use of material and proper coverage.
2: Prepare the Roof Frame
Install rafters at the required spacing according to local code. Add purlins no more than 36 inches apart across the rafters. Place blocking where needed for extra support at edges or openings. A square and level frame supports the panels evenly.
3: Install the Closure Strips
Position horizontal closure strips along the eaves and ridge lines. Fit vertical closure strips along the outside rafters or rakes. These foam or rubber strips fill the corrugations and block insects or debris. Secure them firmly before panels go into place.
4: Measure and Cut the SunTuf Panels
Mark cut lines on the panels while the protective film stays in place. Use a fine-tooth circular saw or handsaw for clean edges. Support the panel fully during cutting to avoid vibration cracks. Keep the film on until the final cleanup after installation.
5: Position and Install the First SunTuf Panel
Place the first panel with the UV side up and the correct slope direction. Start from the side opposite the prevailing wind for better sealing. Predrill oversized holes as recommended by the panel manufacturer to allow for thermal expansion and contraction. Install EPDM washered fasteners without overtightening to allow movement.
6: Install and Overlap the Remaining Panels
Position each next panel with the required side overlap of one or two corrugations. Create end overlaps according to the manufacturer’s requirements and position the overlap over a supporting purlin where required. Predrill and fasten in the same pattern as the first panel. Work across the roof until full coverage is complete.
7: Finish and Seal the Roof Edges
Install remaining closure strips, ridge caps or wall flashings as needed. Apply compatible sealant only at required joints and penetrations. Keep all drainage paths clear of excess material. Edge details complete the weather barrier around the full perimeter.
Step 8: Perform a Final Inspection and Clean Up
Check every fastener for correct tightness and washer seal. Inspect all overlaps and edges for gaps or potential leak points. Remove the protective film from every panel surface. Clear installation debris from the roof and surrounding area.
Common Mistakes to Avoid When Installing SunTuf Roof Panels
Simple errors can shorten panel life or create leaks. Awareness of these problems helps installers avoid costly rework. Careful attention to orientation and support details produces lasting results.
- Installing Panels With the Wrong Side Facing Up: The UV-protected side must face the sun at all times. Improper orientation leads to rapid yellowing and material breakdown. Always check the film marking before placing each panel.
- Using Incorrect Fasteners: Only use approved EPDM washered fasteners made for polycarbonate. Wrong washers or screws can crack the panels or void the warranty. Compatible fasteners seal properly and allow thermal movement.
- Overtightening Screws: Tightening fasteners restricts expansion and can cause buckling or stress cracks. Stop when the washer sits snug against the panel surface. Proper tension keeps the seal without damaging the sheet.
- Failing to Predrill Holes: Drilling full-size holes without clearance stops free expansion. Always predrill 1/4-inch holes centered on the fastener location. This step prevents buckling during temperature changes.
- Using Incompatible Sealants: Some sealants attack polycarbonate and cause clouding or failure. Choose only products listed as safe for polycarbonate use. The correct sealant maintains clarity and long-term strength.
- Incorrect Panel Overlap: Too little overlap allows water to enter under the panels. Follow the manufacturer’s minimums for side and end laps. Adequate overlap over supports creates a reliable weather seal.
- Ignoring Expansion and Contraction: Fixed panels without room for movement buckle or pull at fasteners. Oversized holes and proper fastening solve this issue. Allowance for movement keeps the roof stable year-round.
- Installing Panels on Improperly Spaced Supports: Wide purlin spacing lets panels sag under load or impact. Stay within the 36-inch maximum and prefer 24-inch centers. Correct support maintains strength and appearance.
How Much Should Suntuf Roof Panels Overlap?
Correct overlap creates a watertight joint that handles rain and wind. Side and end laps follow specific minimums for reliable performance. Local conditions can require slight increases for extra protection.
- Side Overlap Requirements: Side overlaps usually cover one or two full corrugations. This amount seals the joint against driving rain. Start the lap sequence opposite the main wind direction.
- End Overlap Requirements: End overlaps should follow the manufacturer’s recommendations for the specific panel profile and roof pitch. Position end laps over supporting purlins where required. Install lower panels first, so water flows over the joints.
- Factors That Can Affect Panel Overlap: Steeper pitches allow for minimum overlap values. Low pitches or high wind areas benefit from greater overlap. Always follow the specific profile guidelines for the panels in use.
Conclusion
Correct installation of SunTuf roof panels creates a light-filled, durable outdoor cover. Careful planning, proper supports and exact fastening deliver long-lasting weather protection. Avoiding common mistakes and performing simple maintenance further extend service life.
Homeowners who follow these steps gain reliable performance for patios, carports and similar structures. Quality results come from attention to every detail during the process. Contact Precision Roofing today for expert help or professional installation of your SunTuf roof panels.
FAQs
How far apart should purlins be for SunTuf panels?
Purlin spacing should follow the manufacturer’s recommendations for the specific panel profile and expected wind or snow loads. Closer spacing may be necessary in areas with higher loads.
Do you need to predrill SunTuf roof panels?
Yes. Predrilling is recommended before driving fasteners. Use hole sizes specified by the manufacturer to allow the panels to expand and contract freely. Skipping this step can increase the risk of buckling or stress damage.
How much should SunTuf roof panels overlap?
Side overlaps cover one or two corrugations depending on the profile. End overlaps should follow the manufacturer’s recommendations, with the overlap positioned over a supporting purlin where required. Adequate overlap creates a reliable seal against rain.