
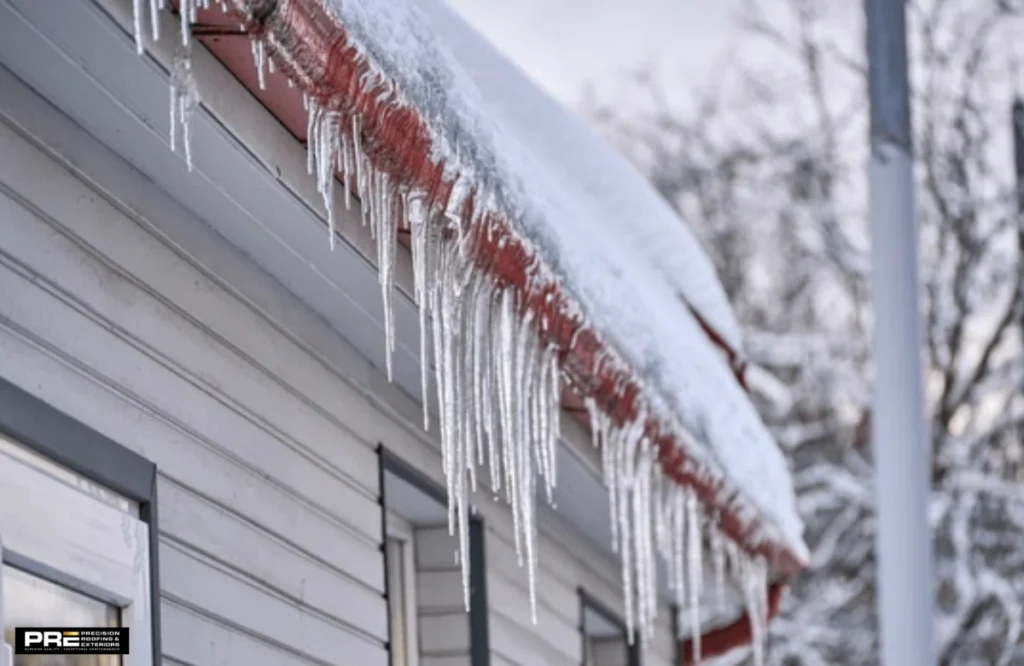
Ice dams form when roof snow melts, runs to the eaves, and refreezes into a ridge that traps more water. That trapped water can back up under shingles and leak into ceilings, walls, and insulation. The root cause is uneven roof temperature: a warm upper roof from attic heat loss and a cold lower edge. Fix the temperature difference, and you reduce the risk.
Here’s the easy way to control: insulate the attic, seal air leaks, keep gutters clear, and add targeted defenses where needed. During storms, remove excess snow from the roof edge and watch for early warning signs indoors. If ice does form, use safe, non-destructive methods to remove it and plan permanent improvements for the next cold spell. This end-to-end approach gives an easy solution for preventing, spotting, and removing ice dams without hassle.
Understanding Ice Dams
Ice dams start with warm air escaping into the attic and heating the roof deck. Snow on the upper roof begins to melt and flows downward, but the lower edge stays cold and forces that meltwater to freeze again. This creates a ridge of ice at the eaves. As more meltwater runs into that ridge, it pools behind the frozen barrier and can slip under shingles. Reducing heat loss inside the home and keeping exterior drainage clear are the two main ways to stop this cycle.
Signs to Spot Ice Dams
These steps are effective when it comes to spotting ice dams. Here are some common signs you can get:
- Ceiling Water Stains: Brown rings or damp patches, especially near exterior walls, suggest water backing up under shingles.
- Sagging or Wet Insulation: Insulation that feels heavy or looks matted indicates moisture entry from above.
- Ice Buildup in Gutters: Thick ice at eaves, large icicles, or frozen downspouts signal poor drainage and a likely dam.
- Cold Spots on Interior Walls: Chilly bands near ceilings may point to missing insulation and heat loss at the top plate.
- Refreezing Meltwater Lines: Visible refreeze trails on shingles or fascia mean repeated melt–freeze cycles are underway.
Prevention Tips for Ice Dams
Below are some of the best prevention tips to follow for ice dams:
Boost Attic Insulation
- Increase insulation to the recommended R-value for your climate.
- Cover the entire attic floor evenly; avoid thin spots near eaves.
- Insulate and weatherstrip the attic hatch.
Seal Warm Air Leaks
- Caulk or foam gaps around light fixtures, plumbing stacks, and electrical penetrations.
- Seal top-plate cracks and chimney chases with fire-safe materials.
- Use airtight covers for recessed lights rated for insulation contact.
Install Ice Barriers
- Add a self-adhering ice and water shield under new roofing along eaves, valleys, and penetrations.
- Extend the membrane far enough upslope per local code.
- Pair with proper underlayment and balanced ventilation.
Add Heat Cables Strategically
- Place self-regulating cables in a zigzag at the lower roof and into the gutter/downspout path.
- Use with a dedicated, protected circuit and follow manufacturer spacing.
- Treat it as a supplement, not a substitute for insulation and air sealing.
Maintain Clean Gutters
- Clear leaves and debris before winter so meltwater can flow.
- Confirm downspouts discharge away from the foundation.
- Consider gutter guards that don’t trap snow.
Quick Fixes to Remove Ice Dams
Below are some of the best practices to remove ice dams:
Hot Water Socks
- Fill permeable fabric tubes (e.g., pantyhose) with calcium chloride and lay them perpendicular across the dam.
- They melt channels to let water escape.
- Avoid rock salt; it stains and can damage metal and plants.
Snow Raking
- Use a roof rake with a long, non-conductive handle from the ground.
- Pull off the first 3–4 feet of snow above the eaves to reduce meltwater.
- Never stand on icy roofs or chip shingles with metal tools.
Steam Removal
- Professional teams use low-pressure steam to cut and lift ice without harming shingles.
- Best for thick dams or active leaks.
- Book early during heavy winters; demand spikes.
Calcium Chloride
- Sprinkle pellets in controlled amounts along the dam or inside hot water socks.
- Protect nearby landscaping; rinse in spring if possible.
- Do not pour liquid de-icers that can penetrate roof layers.
Heat Cables
- Temporarily power heat cables to open melt paths at the eaves and in downspouts.
- Turn off when channels are clear to save energy.
- Inspect for damage before use each season.
Gutter Clearing
- Remove loose snow and ice from gutters if safely accessible from the ground.
- Keep downspout mouths open to prevent overflow.
- Don’t pry frozen gutters; let them thaw naturally.
Temporary Warm Air
- Place a box fan in the attic to blow cool interior air at the underside of the leak area, slowing water ingress.
- As a stopgap, aim gentle warmth at interior ceiling spots to speed drying, not to melt roof ice.
- Use dehumidifiers to reduce moisture indoors.
Conlcusion
Lasting control starts inside the house. Improve attic insulation, seal air leaks, and add an ice barrier when reroofing. Keep gutters clear and use heat cables only where they add value. During storms, remove roof-edge snow early and watch for warning signs like ceiling stains or heavy icicles. If a dam forms, choose safe methods, snow raking from the ground, calcium chloride in fabric socks, or professional steaming. By preventing, spotting, and removing ice dams proactively, you stay ahead of the risk curve and avoid unnecessary damage. Combine quick fixes with long-term upgrades, and winter becomes routine instead of turning into risky situations.
If you are in search of reliable and professional guidance to spot, prevent, and remove ice dams, reach out to professional roofing contractor like Precision Roofing.