
Fixing a leaking roof from the outside might seem challenging, but with the right tools and knowledge, you can handle it yourself. The first step is finding the leak. If you have an attic, check for wet spots or dark mold on the wood or insulation. Use a flashlight to spot any shiny or damp areas. If you don’t see anything, try using a garden hose to recreate the leak while someone watches from inside to pinpoint the location.
Once you’ve found the problem, check for missing shingles, torn flashing, or clogged areas where water might collect on your leaking shingle roof. For asphalt shingles, carefully remove the damaged one with a flat bar and replace it with a new shingle. Use roofing nails and seal the edges with roof sealant to secure it. If the issue is with flashing, such as around chimneys or vent pipes, inspect for cracks or tears. You may need to replace the flashing or use sealant as a temporary fix. Damaged vent boots can also cause leaks; replace the boot by sliding a new one over the pipe and securing it with nails and sealant.
For leaking flat roofs with rubber membranes, cut a patch from a similar material, clean the area, and attach it using rubber cement and sealant. If the roof is steep or extensively damaged, calling a roofing contractor is likely the best option.
7 Tips for Repairing Outside Roof Leaks
Repairing a leaky roof from the outside can be challenging. However, it’s not impossible. You just need to have the right knowledge and tools. The first step is identifying the leak source, and this is the hardest part. Water flows along the roof before dripping inside, making this part difficult.
1. Find The Source of the Leak
Here is how you can find the source of the leak:
Look Uphill
Start by scanning the roof uphill from where the water drips inside. According to most roofing experts, leaks are usually found at surface penetrations by vents, skylights, chimneys, or valleys where the heaviest drainage occurs.
Check the Attic
If your home has an attic, it’s a great place to pinpoint the leak. Use a flashlight to check for wet spots on the roof’s underside, water stains, or damp insulation. Sometimes, water runs to openings like light fixtures, making locating the leak easier. You might also see nails with frost (called “shiners”)—these collect moisture and drip when the attic warms up.
Get a Helper to Spot the Leak
Finding precisely where the roof leaks can be tricky and difficult, so having someone help you can make the process easier. Ask a buddy or family member to stand inside and act as your spotter. You’ll need to talk while doing this, so have your phones handy.
Here’s how to do it:
- Determine the General Area: Have that person remain inside where they can see the leak, and watch for water dripping while you test the roof.
- Perform a Hose Test: Go onto the roof safely and use a garden hose to spray water on the area above the suspected leak. Start with one spot and gradually move to other areas if nothing shows up.
- Test Left and Right: Spray water on the left side of the suspected leak for a few minutes while your helper looks for drips inside. Then do the same on the right side.
- Mark the Leak: Once your helper sees water coming in, they can tell you where it is. Mark the spot on the roof so you can easily find it when you start the repair.
This method helps you locate the leak efficiently, making the repair process smoother.
2. Repair Damaged Flashing or Vent Boots
Over the years, flashing tends to crack and tear. Flashing is the metal or plastic material installed around chimneys, vents, or valleys. Inspect it to see whether there are any cracks or rusted areas. Likewise, vent boots may also crack or rot as they seal the area where pipes go through the roof. Slide out old ones and install new vent boots and flashing. ones. Seal edges with roof sealant to prevent roof leaks.
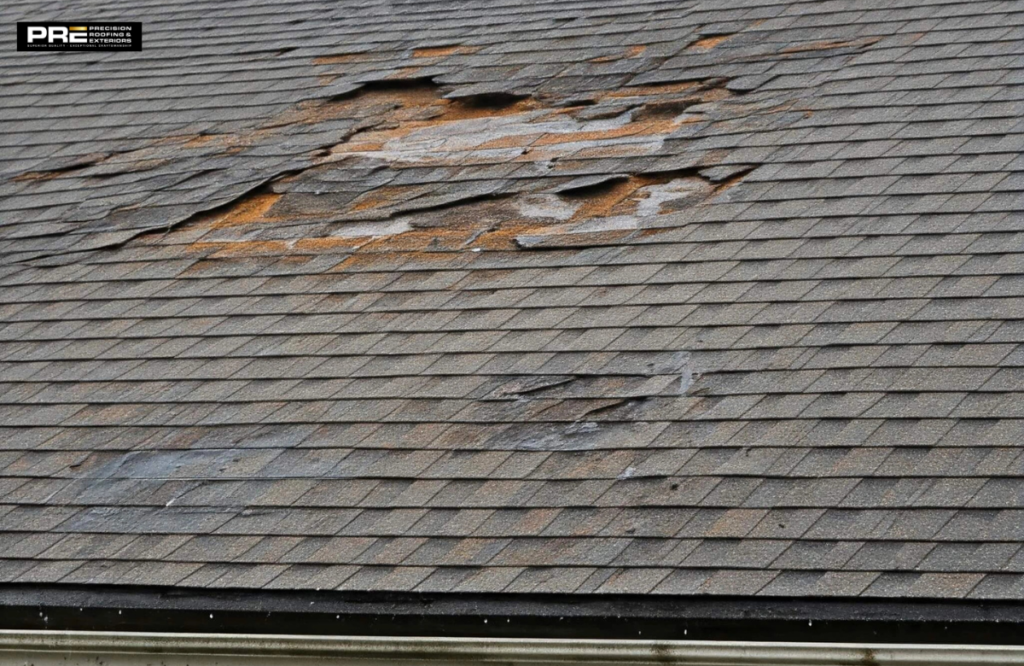
3. Change Broken or Missing Shingles
Carefully remove the shingle if it is broken or missing. Pry the nails using a flat bar and slide the old shingle out. Take the new shingle, slide it in place, and nail it down. Put roof sealant under the edges of nearby shingles to hold them in place and prevent the passage of water. for more reliable and professional results, it is better to seek shingle roof installation services.
4. Inspect Joints and Valleys
Leaks mostly occur around roof joints, valleys, and intersections. Check for proper fastening and overlaps in the flashing. If there is loose or rusted flashing, replace it with a new piece, ensuring it is nailed and sealed.
5. Patch Small Holes
Small holes left over from nails or old satellite dish mount installations develop leaks over time. Small holes are easy to fix, but using roofing caulk might not last long. Liquid flashing, made for sealing things like recessed windows, is better. Another way to fix the hole is by sliding a metal flashing under the damaged shingles.
6. Deal with Chimney Leaks
Inspect the flashing to see if water leaks by or around a brick chimney. If the flashing rusts, slide a new piece under the old one to drive the water in another direction. However, new flashing may be required to install as a more permanent fix.
7. Clean the Gutters
Last but not least, clean gutters. Broken gutters can cause buckets of water to gather and pool on the roof, leaking through and causing damage. Make sure that the gutters are free from leaves, twigs, and other debris. Carrying out this simple task is important to keep the water draining properly from the roof into the ground. This simple task can prevent leaking and save thousands from damages during rains.
Conclusion
Fixing a leaking roof from the outside might seem hard, but it’s manageable with the right steps. Start by finding the leak, either by checking your attic for wet spots or using a garden hose to test the roof while someone watches inside. Once located, inspect for common issues like damaged shingles, cracked flashing, or vent boots, and make necessary repairs. Replace missing shingles, patch small holes, and clear clogged gutters to ensure proper drainage. Regular maintenance can prevent future problems. For expert help with repairs or inspections, trust Precision Roofing. We offer the most reliable and professional service in town. For more information, you may visit our website.