
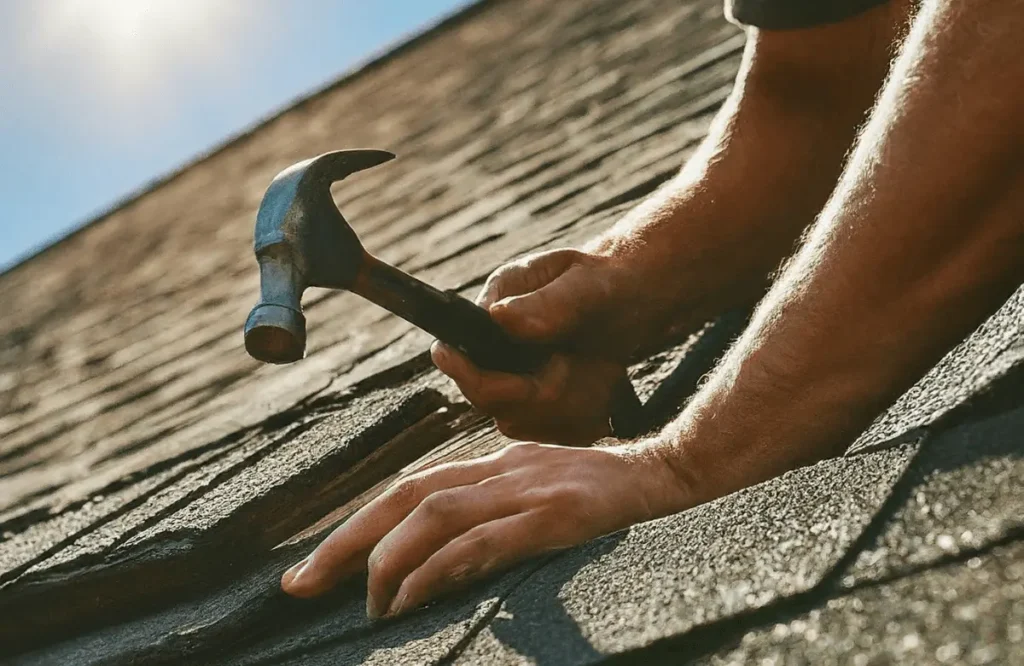
Shingling a gable roof means building protection layer by layer. Start with sound decking, then install edge protection and underlayment. Starter shingles create the base for the first course. From there, stagger asphalt shingles evenly toward the roof peak. Flashing protects vents, walls and other leak-prone areas. Nail placement matters because poor fastening can weaken wind resistance. Roof slope also affects gable roof shingle installation details and moisture protection. Following the product instructions helps every component work together properly. Careful layout keeps courses straight and reduces avoidable roofing problems.
Key Takeaways
|
Before Installing Shingles on a Gable Roof
Roofing goes smoother when important checks happen before installation starts. Review the slope, decking, safety setup, weather and product requirements before fastening any new shingles.
- Confirm the Roof Slope: Asphalt shingles need enough pitch to shed water reliably. Lower slopes usually demand stronger moisture protection beneath the finished roofing.
- Follow Manufacturer Specifications: Product instructions control important details throughout the installation process. They explain nailing zones, exposure, offsets, starter placement and required fastening patterns.
- Look Closely at the Deck: New shingles can’t fix damaged or unstable roof sheathing underneath. Replace deteriorated sections before covering them with underlayment and roofing materials.
- Set Up Safe Access: Proper ladder positioning helps you enter and leave the roof safely. Use suitable fall protection whenever the roof height and conditions require it.
- Watch the Forecast: Calm, dry weather gives you better control over roofing materials. Wet decking or strong gusts can interrupt installation and increase hazards.
- Check Current Building Rules: Local requirements may influence permits, ventilation, fasteners, or underlayment choices. Verify those details early instead of correcting completed work afterward.
Tools and Materials Needed for Gable Roof Shingle Installation
Having the right equipment nearby keeps the installation moving smoothly. Exact supplies depend on the roof condition and selected products. However, most asphalt shingle projects need equipment for tear-off, measuring, cutting, fastening, waterproofing, flashing and cleanup.
Common tools include:
- Roofing hammer or properly adjusted roofing nailer
- Roofing shovel or pry bar for tear-off work
- Utility knife with replacement blades
- Chalk line for maintaining straight courses
- Tape measure for roof and material measurements
- Caulking gun for approved roofing sealants
- Broom for cleaning the roof deck
- Stable extension ladder
- Suitable fall-protection equipment
- Work gloves and slip-resistant footwear
Typical roofing materials include:
- Asphalt field shingles
- Compatible starter shingles
- Matching ridge cap shingles
- Roofing underlayment
- Leak barrier where required
- Metal drip edge
- Approved roofing nails
- Step flashing where needed
- Pipe boots and penetration flashing
- Approved roofing sealant or cement where specified
Check every component before installation begins. Mixing incompatible products can create performance or warranty problems later. Starter strips, ridge caps, nails and underlayment should meet the requirements of the roofing system you plan to install.
Steps for Installing Shingles on a Gable Roof
Once measurements and materials are ready, installation should follow a careful bottom-to-top sequence. Each layer helps direct water toward the roof edge. Skipping one small detail can create trouble far beyond that seemingly harmless shortcut.
Step 1: Remove Old Roofing and Inspect the Roof Deck
Start by removing existing shingles when a complete tear-off is required. Pull remaining nails and clear loose roofing material from the deck. Sweep the surface thoroughly because debris can prevent new materials from sitting flat.
Next, inspect the plywood or OSB closely. Watch for rot, softness, swelling, broken edges, delamination, or sections with weak nail-holding strength. Replace damaged decking before continuing. New shingles perform best when the surface underneath remains clean, dry, smooth and structurally sound.
Step 2: Install Eave Drip Edge and Required Leak Protection
Drip edge helps direct runoff away from exposed roof-deck edges and fascia. Install the eave sections according to local requirements and manufacturer instructions. Keep pieces straight because uneven metal can affect the appearance of the starter course above.
Next, install any required leak barrier near vulnerable areas. Depending on climate, roof design and applicable requirements, this protection may extend along eaves or other water-sensitive sections. Keep the membrane smooth while avoiding wrinkles that could telegraph through shingles.
Step 3: Install Roofing Underlayment
Underlayment creates a secondary layer between asphalt shingles and the roof deck. Begin near the lower roof edge and work upward. Each higher course should overlap the lower material according to its specific installation requirements.
Keep the underlayment straight and reasonably tight across the decking. Avoid large wrinkles, bubbles, or folds. Use approved fasteners in the correct locations. Lower-slope gable roofs may require additional layers or different overlap arrangements for stronger water protection.
Step 4: Install the Rake Drip Edge
After the appropriate underlayment layers are positioned, complete the drip edge along the gable ends or rakes. This edge protects exposed roof decking while creating a clean boundary for starter strips and finished shingles.
Layering matters because roofing components must shed water toward the exterior. Follow local code and manufacturer instructions for the exact sequence. Keep rake pieces aligned carefully since wavy edges remain visible after the roofing work finishes.
Step 5: Snap Chalk Lines and Plan the Shingle Layout
Straight courses rarely happen by accident. Before fastening field shingles, use chalk lines as visual references across the roof. These marks help maintain consistent exposure while preventing each row from slowly creeping upward or downward.
Plan the course offset at the same time. Offset describes how far each new course shifts horizontally from the previous one. Proper staggering keeps joints from lining up repeatedly. Follow the shingle manufacturer’s pattern instead of guessing the spacing.
Step 6: Install Starter Shingles Along Eaves and Rakes
Starter strips form the foundation beneath the first field course. They also provide sealing protection near roof edges where wind can place considerable pressure on shingles. Install compatible starter material along the eaves according to product instructions.
Many roofing systems also require starter strips along rake edges. Position the factory sealant correctly and maintain the specified edge relationship. Purpose-made starter products simplify this step because their dimensions and adhesive placement already suit roofing-edge applications.
Step 7: Install the First Course of Field Shingles
Place the first field course directly over the completed starter layer. Align its lower edge according to the manufacturer’s required overhang or drip-edge relationship. Keep the first row straight because every later course builds from that starting point.
Fasten each shingle inside its designated nailing zone. Drive nails straight and flush with the surface without cutting into the material. Incorrect fastening can weaken holding power even when the finished roof appears perfectly aligned from the ground.
Step 8: Continue Courses Using the Correct Offset and Exposure
Continue upward while following the product’s specified exposure and offset pattern. Exposure refers to the visible portion of each installed shingle course. Offset describes the horizontal shift between joints in one row and those below it.
These measurements aren’t interchangeable. More importantly, they aren’t universal across every asphalt shingle. Use periodic chalk lines to monitor alignment while working upward. Small placement errors can multiply across several courses and become obvious near the ridge.
Step 9: Flash Vents, Chimneys and Roof-to-Wall Connections
Roof penetrations interrupt the natural water-shedding pattern of overlapping shingles. That makes flashing one of the most important parts of installation. Pipe vents, chimneys, skylights, sidewalls and other intersections need properly integrated flashing systems.
Work shingles and flashing together rather than treating flashing as an afterthought. For example, step flashing usually integrates with individual courses beside a wall. Pipe boots must also overlap surrounding shingles correctly. Sealant can support specific details, though it shouldn’t replace proper flashing.
Step 10: Complete Both Slopes and Install Ridge Vent if Required
Continue the same layout across both sides until shingles reach the ridge. Trim the final field courses according to the roofing system’s instructions. Avoid leaving unnecessary exposed fasteners near the roof peak.
Some gable roofs use ridge vents as part of their attic ventilation system. When the roof design calls for one, install the compatible vent before applying ridge caps. Don’t add a ridge vent automatically because ventilation requires balanced intake and exhaust planning.
Step 11: Install Ridge Cap Shingles
Ridge cap shingles cover the joint where both gable roof planes meet. Use caps designed or approved for the selected roofing system. Center them across the ridge while maintaining the manufacturer’s specified exposure and fastening pattern.
Work consistently toward the opposite end while allowing each cap to cover the previous fasteners. Finish the final cap according to product instructions. Once complete, inspect the ridge closely because exposed nails or loose caps can create vulnerable points.
How to Measure a Gable Roof for Shingles
Accurate measurements prevent two frustrating situations: buying too little material or paying for stacks you never use. A simple gable roof makes estimating easier because it usually contains two rectangular roof planes meeting along one central ridge.
Calculate the Roof Area
Measure the length and slope width of each roof plane. Multiply those numbers to calculate each section’s square footage. Then add the areas from both sides together to determine the approximate total roof surface.
Measure along the actual sloped surface rather than using only the home’s floor dimensions. Roof overhangs increase the covered area. Add separate measurements for attached sections when porches, extensions, or other roof surfaces connect with the main gable.
Convert Square Footage Into Roofing Squares
Roofing materials are commonly estimated using “squares.” One roofing square represents 100 square feet of roof area. For example, a 2,000-square-foot roof contains approximately 20 roofing squares before accounting for waste and additional materials.
Don’t assume every shingle package covers the same area. Bundle size and coverage can vary by product. Check the manufacturer’s stated coverage before calculating quantities. That simple step prevents an unpleasant last-minute trip for several missing bundles.
Allow for Cuts and Waste
Every installation creates some material waste through trimming, starter layouts, damaged pieces and course offsets. Simple gable roofs typically create less waste than roofs containing several valleys, dormers, hips and complicated intersections.
Include a reasonable waste allowance when ordering materials. The appropriate amount depends on roof dimensions and shingle layout. Product packaging, roof complexity and planned offset patterns can influence the final quantity more than one universal percentage suggests.
Measure Starter, Ridge Cap, Underlayment and Drip Edge
Field shingles aren’t the only materials requiring accurate measurements. Measure the total eave and rake lengths for starter products and drip edge. Then measure the ridge length to estimate the required ridge cap material.
Underlayment calculations should account for the complete roof deck plus required overlaps. Measure around walls, chimneys, vents and similar features when estimating flashing components. Ordering these pieces together helps prevent unnecessary interruptions once roofing work begins.
How to Nail Asphalt Shingles Correctly
Correct nailing keeps asphalt shingles secure, flat and ready for changing weather. Small fastening mistakes can weaken holding strength and create avoidable roofing problems later.
- Use the Correct Nailing Zone: Place every nail inside the manufacturer’s marked or specified nailing zone. Nails driven too high or low can reduce shingle holding strength.
- Drive Nails Straight and Flush: Drive nails straight until each head sits flush with shingles. Overdriven nails damage material while raised nails prevent proper seating.
- Follow the Required Fastening Pattern: Follow the fastening pattern listed for your exact shingle product. Wind zones, steep slopes and product design can change nail requirements.
What Goes Under Shingles on a Gable Roof?
Asphalt shingles form only the visible upper layer of the roofing system. Beneath them, several components work together to support the shingles and manage water. Understanding their order makes the entire installation process easier to follow.
A typical assembly can include:
- Roof deck: Plywood or OSB provides the structural fastening surface.
- Leak barrier: Vulnerable areas may need additional waterproof protection.
- Underlayment: This layer adds secondary moisture protection across the deck.
- Drip edge and flashing: Metal details direct water away from vulnerable transitions.
- Starter shingles: Starter material supports and seals the lower field-shingle edges.
- Field shingles: Overlapping asphalt courses create the primary weather-facing surface.
- Ridge components: Ridge vents, when required and cap shingles complete the roof peak.
Exact layering can vary around edges, penetrations and special roof details. Think of the roof as several overlapping defenses rather than one waterproof surface. Each component needs to direct water onto the layer below without trapping it underneath.
What Is the Minimum Roof Pitch for Asphalt Shingles?
Most standard asphalt shingle systems require a roof slope of at least 2:12. A roof between 2:12 and below 4:12 generally needs enhanced underlayment protection because slower drainage increases the chance of water reaching beneath the shingles.
A roof below the shingle manufacturer’s minimum slope needs another roofing approach. Low-slope membranes are designed differently because they manage water differently from overlapping asphalt shingles. Always confirm the selected product’s slope limitations before installation begins.
How Far Should Shingles Overhang the Drip Edge?
The correct overhang depends on the shingle manufacturer and drip-edge design. Some systems specify a small extension beyond the edge while others allow shingles to align differently with certain drip-edge profiles.
Avoid choosing an overhang based purely on appearance. Too much material can become vulnerable to wind or bending. Too little may affect runoff at the edge. Follow the approved installation instructions for the exact roofing system.
How Many Nails Should Go in Each Asphalt Shingle?
The required number varies by shingle product and installation conditions. Standard fastening patterns may differ from patterns required for steep slopes or enhanced wind performance. That makes one universal nail number unreliable across every roof.
Check the bundle instructions before fastening. Equally important, place each nail in the specified zone. Adding extra fasteners won’t compensate for nails driven into the wrong part of the shingle.
Should Starter Shingles Go Along the Rake Edges Too?
Many modern roofing systems use starter strips along both eaves and rake edges. The starter sealant near those boundaries helps the overlying field shingles resist wind uplift while creating a neat roof perimeter.
However, follow the requirements for the specific starter and field shingles being installed. Orientation matters because the factory adhesive needs to sit where it can bond correctly with the overlying shingle edge.
Do You Need Underlayment Beneath Asphalt Shingles?
Yes, asphalt shingle roofing systems commonly use approved underlayment over the roof deck. This layer provides secondary protection when wind-driven rain or damaged shingles allow moisture beneath the finished roof covering.
Underlayment requirements depend on roof slope, roofing product and applicable construction rules. Lower slopes often need enhanced protection. Never use the same lap pattern automatically across every roof without checking the selected underlayment instructions.
How Do You Stagger Shingles on a Gable Roof?
Stagger shingles by shifting successive courses horizontally according to the manufacturer’s required offset pattern. This arrangement prevents end joints from repeatedly lining up while maintaining the intended appearance across the roof surface.
Don’t confuse offset with exposure. Offset controls horizontal joint placement. Exposure controls how much of each course remains visible vertically. Follow both measurements carefully because each serves a different purpose.
Can New Shingles Go Over Existing Shingles?
Some reroofing situations may allow new asphalt shingles over an existing layer. However, local codes, roof condition, manufacturer requirements and warranty terms can limit that option. The existing surface must also provide an acceptable installation base.
A tear-off offers one major advantage because the decking becomes visible. Hidden rot, damaged sheathing and old flashing problems are easier to identify before new materials cover them again. Check all applicable requirements before choosing an overlay.
Conclusion
A durable gable roof depends on more than laying asphalt shingles in overlapping rows. Start with sound decking, proper edge protection, suitable underlayment and correctly positioned starter strips. Then follow the manufacturer’s exposure, offset and fastening requirements while working toward the ridge. Careful flashing around vents, walls and other penetrations helps keep vulnerable areas protected.
Finally, inspect nails, edges, ridge caps and roof ventilation before considering the work complete. If your roof needs new shingles or professional attention, contact Precision Roofing and Exteriors for a free estimate and dependable roofing solutions tailored to your property.